The Great Debate…
Seating charts can be one of the most difficult and taxing parts of wedding planning. So the question is, is it worth it? In today’s post, we will deep dive into seating chart pros and cons and learn how to create a seating chart in 6 easy steps! You’ll also get a downloadable seating chart template if you stick around until the end!
Take a walk in your guests’ shoes
Picture this, you’ve just witnessed a beautiful ceremony, enjoyed a refreshing Moscow Mule during cocktail hour, and watched the couple dance their first dance as husband and wife. Now it’s time for dinner.
You follow the crowd like a heard of sheep through the buffet line to the reception area. Your plate is overflowing with wedding food, your drink is sloshing in your other hand, and you are balancing your purse on your shoulder. Now what?
Should you sit at an empty table only to be joined by Great Aunt Tessie a few minutes later? Do you walk up to a nearly full table and get the “this seat is taken” response? Maybe you’ll just walk back and forth with your food until someone invites you to sit down? Any route you choose, it will not be a comfortable experience.
How do we avoid this?
Now imagine the same experience, but with little bit of guidance. If there had been a well thought-out seating chart at the end of the buffet line or outside of the reception area, you would’ve been eating and catching up with long-lost college buddies (you probably didn’t even know were there) instead of wandering around while your steak got cold.
Seating Chart Pro’s and Con’s
In addition to the awkward nightmare of an example above, there are some other scenarios a seating chart can help prevent.
Pros:
- No awkward, aimless seat finding for your guests
- You can strategically place family members or friends who might have some “past drama” to avoid future drama
- You can seat groups of people with commonalities together
- You can ensure that your wedding party and immediate family is in close proximity to you and your new spouse
- You can avoid ticking your mom off by making sure she’s not stuck in the back of the room
- If you have a seated dinner, it will guarantee guests with food allergies or restrictions will receive their correct meal
- Since you created this chart, you will have a general idea of where everyone is in the reception room. This will make it much easier to find and talk to your guests!
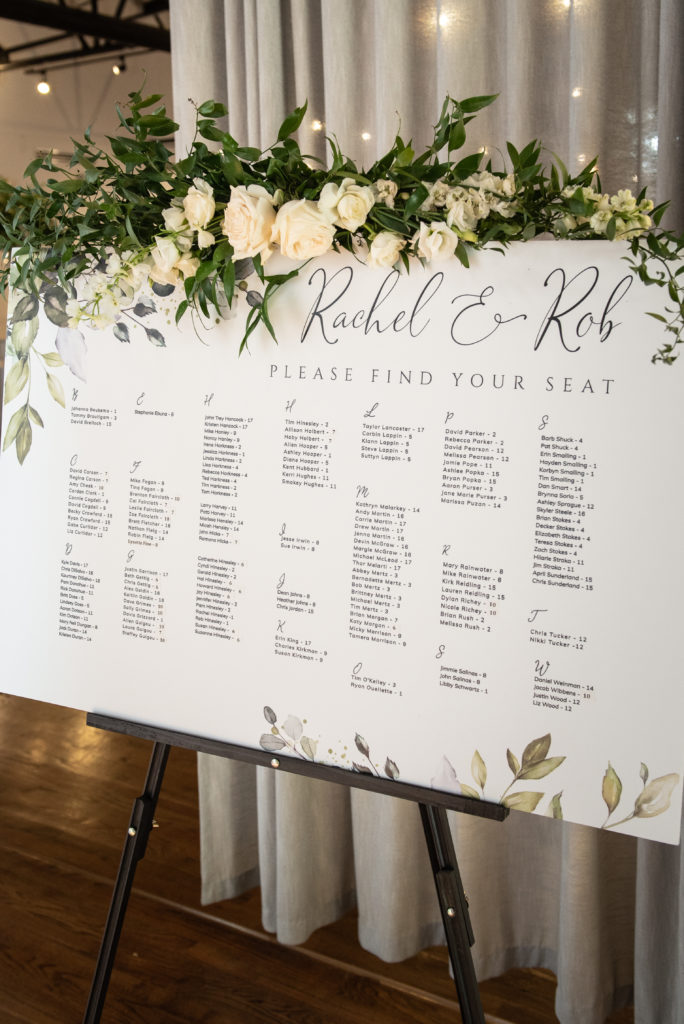
- It can also be a beautiful piece of decor!
Cons:
- Creating a seating chart takes time and a lot of hard work

Create your seating chart in 6 easy steps!
Although creating a seating chart will always require a lot of time and effort, it doesn’t have to be the Everest of wedding planning. Follow these steps to take some stress out of the process:
Step 1: Logistics.
The first thing you want to do when creating your seating chart is talk to your venue about the approximate number of guests attending and the layout of reception area. Your venue should be able to tell you how many guests can sit at each table and how many tables can fit in the space. Once you have the layout and the math figured out, you can start creating the chart!
TIP: It is always better to over-estimate your guest number. It’s better to have too many seats than not enough!
Step 2: Tools.
I have found that the easiest way to create a seating chart is in an Excel Spreadsheet. In the spreadsheet, you can easily input names into groups that exactly mimic the layout of the reception area. You can also color-code, sort, and search for guest names. I have included a FREE downloadable version of my seating chart template at the end of this post!
Step 3: Strategy.
Try strategizing your table groups and layout before inputting any names. Start with your sweetheart or head table and work your way down. If the sweetheart table is at the front of the room, you would then fill the tables closest to you with your wedding party and/or immediate family. You could then fill the tables in the middle of the room with extended family and/or close friends. After those groups are accounted for, fill the rest of the room with groups of distant family, acquaintances, and people your grandma begged you to invite.
Step 4: Grouping.
Once you have an overview of your strategic layout, then you can assign specific group names to the tables. For example, Table 1 (closest to bride and groom) could be labeled “Bride/Groom Parents and Grandparents”. Table 10 (middle of the room) could be named “Groom Fraternity Brothers” or “Bride Family Friends.” Table 20 could be called “Distant Cousins”.
Step 5: Name Input.
Now that you have a strategic layout and your table groups labeled, you can start inputting individual names. This step will be easy as pie since your tables have already been grouped, you just input guests according to their category! It’s like painting by number!
Step 6: Adjusting.
Since you created your seating chart by overestimating your guest number, you will need to adjust as your RSVP’s come in. This seems daunting, but since your seating chart is strategically grouped, you can simply shift people around within their table groups!
TIP: It is always a good idea to have an extra table dedicated to “Open Seating” just in case!

I think you’re ready!
Seating charts can be intimidating, but they can also be an effective tool to streamline the flow of your wedding and bring ease to your guests. I hope that we’ve provided you with the resources and tips to tackle your seating chart head on!
Don’t forget to download your seating chart template!
Happy Wedding Planning!
xoxo,
Sammy
Interested in having the Jackson & June Team plan, design, or coordinate your big day? Find out more here!

add a comment
+ COMMENTS